
Recently, I worked on developping a custom application for a nRF52833 microcontroller from Nordic Semiconductor. Developping for such a device means using the Zephyr RTOS with Nordic’s additions on top, giving the nRF Connect SDK. As this SDK is quite heavy to setup, I decided to use a Devcontainer on Visual Studio Code to make this easy to replicate in the future. Here’s what I did !
Everything starts with a Docker container. Nordic Semiconductor provides a container embedding all the required tools to compile nRF Connect SDK applications. Thanks Nordic !
The magic is not in there. In parallel, Visual Studio Code, my preferred code editor, enables developers to create Devcontainers. It means that you’re developping on your PC as usual but with a VSCode instance embedded in a container, with its dedicated settings, toolchain and extensions. Then to make the full picture, it means that I can now develop inside the nRF Connect SDK container, with VSCode. Even better, there is a nRF Connect extension pack for VSCode which helps to use the SDK’s tools.
This means that if I want to reuse my project in two years, on another computer, the only requirement I need to install is the Docker engine and VSCode. No need to setup a full SDK with the right versions on each computer I want to use. Perfect ! Another nice benefit is that the extensions are not installed on my main VSCode instance but on the container’s one. Then, when I won’t be developing with this Devcontainer, I won’t be bothered with the heavy unrelated extensions.
How-to
How to make a project with a Devcontainer ? That’s easy. First as I said, install VSCode and the Docker engine. Then install the Remote Explorer extension. You can now create a .devcontainer folder with a devcontainer.json file inside in your project root. This file is interpreted by VSCode to define the container to use, the target extensions and settings to setup. Below I’ll explain all files, in addition of the comments.
.devcontainer/Dockerfile
Here is the main Docker file. In this one, I derive from Nordic’s prebuilt image version 2.5. After updating the distro, I then install git to be able to use it inside the container, and gdb-multiarch to debug my app. In theory, we don’t need it, but in practice the default debugger of the nRF Connect app doesn’t work for me.
.devcontainer/devcontainer.json
This file tells VSCode how to handle the container and how to configure the embedded development environment.
Here is a summary of the extensions I chose:
- nRF Connect extension pack, of course
- CppTools, to handle the C/C++ languages
- CMake language support, to handle the CMake syntax
- Git Graph, to have a visual git feedback
- Duplicate lines, to easily duplicate the current line(s) with Ctrl+D
- Debug-tracker, because we need it for the debugger API
- Cortex-Debug, to debug the target (as Nordic’s debugger doesn’t work for me)
Finally, the current directory is mounted in the container, and the access to USB devices such as my JLink debugger is granted.
.vscode/launch.json
In this file, we configure the debugger and tell it how to handle the device and the app. We specify the SVD file linked to our MCU. The SVD file the maps each MCU’s specific peripheral address to named bitfields, making it easier to debug.
The result
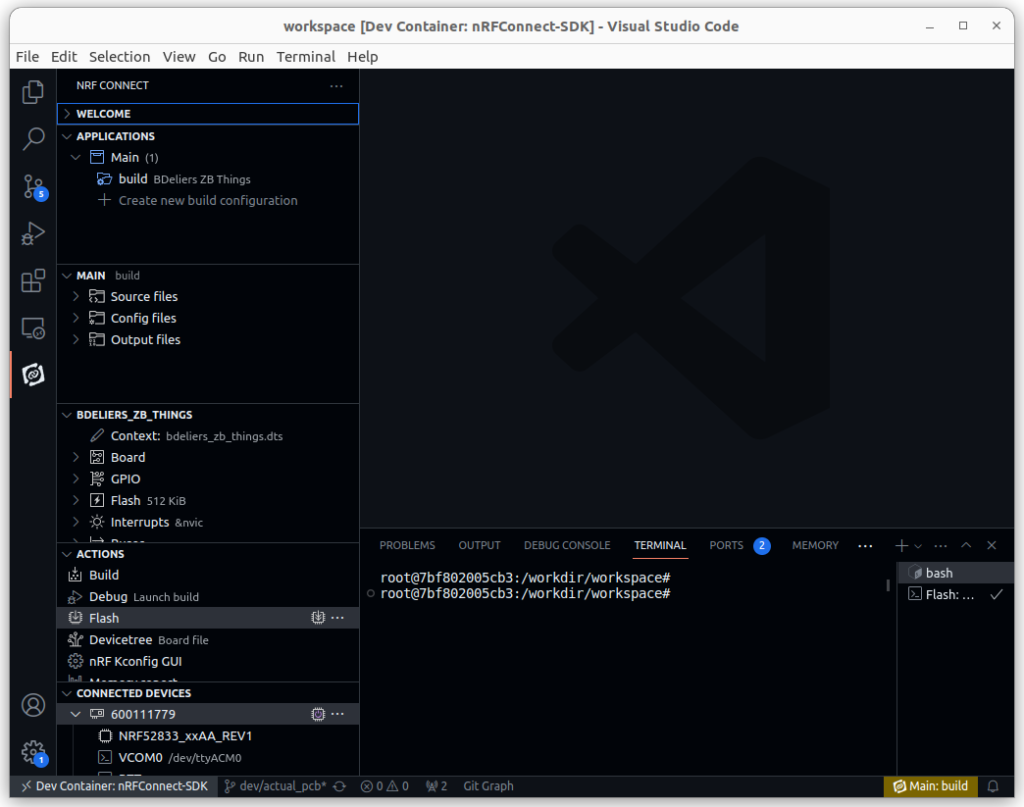
Now that everything is configured, you can start the devcontainer from the remote explorer menu, on the left of your IDE. VSCode will build it automatically, and that’s it !
Maybe it’s not very pretty to show, but here is a screenshot of my VSCode environment. It detected my nRF app and the target connected to my JLink.
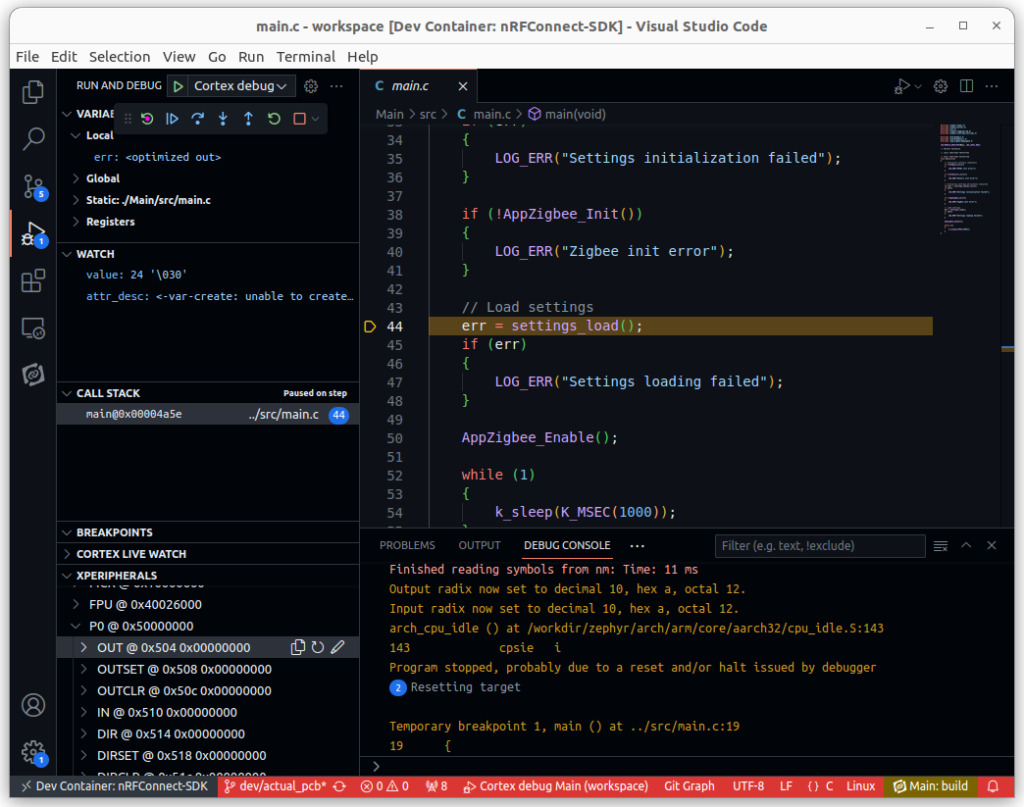
And here is how it looks when debugging. We can see in the bottom-left of the window that each peripheral from my nRF52833 is shown with its current bit values.
I hope this article can help and make you save time in your future developments ! In my case, it will as much for my hobby and professional projects.