
As probably everybody, I become quite lazy when my workday is over. Having more than one remote on my living room’s entertainment system becomes then a mountain. Yes, three: the TV itself, the receiver and the home-cinema audio system. The HDMI consortium solved this issue with the creation of the CEC (for Consumer Electronics Control) bus.
The HDMI CEC is a control interface which enable the control of a complete entertainment system with only one remote. The solution is there! But (yes, always a but) when your hardware is too old to handle HDMI – my audio system so – the world is not perfect again.
Here comes my project! What is CEC Blaster? It’s a device that you can plug to your HDMI TV which behaves as a device on the CEC bus, then convert CEC commands to infrared commands to control the legacy hardware. In my case, the CEC Blaster behaves as an audio playback device. It means that I finally can control all my system with a single remote !
Hardware
Here is my BOM:
- Nucleo-H563ZI, featuring an STM32H563 which has a CEC peripheral
- HDMI connector
- Infrared LED
- NPN transistor BC547B
- Few basic components
- Prototyping board
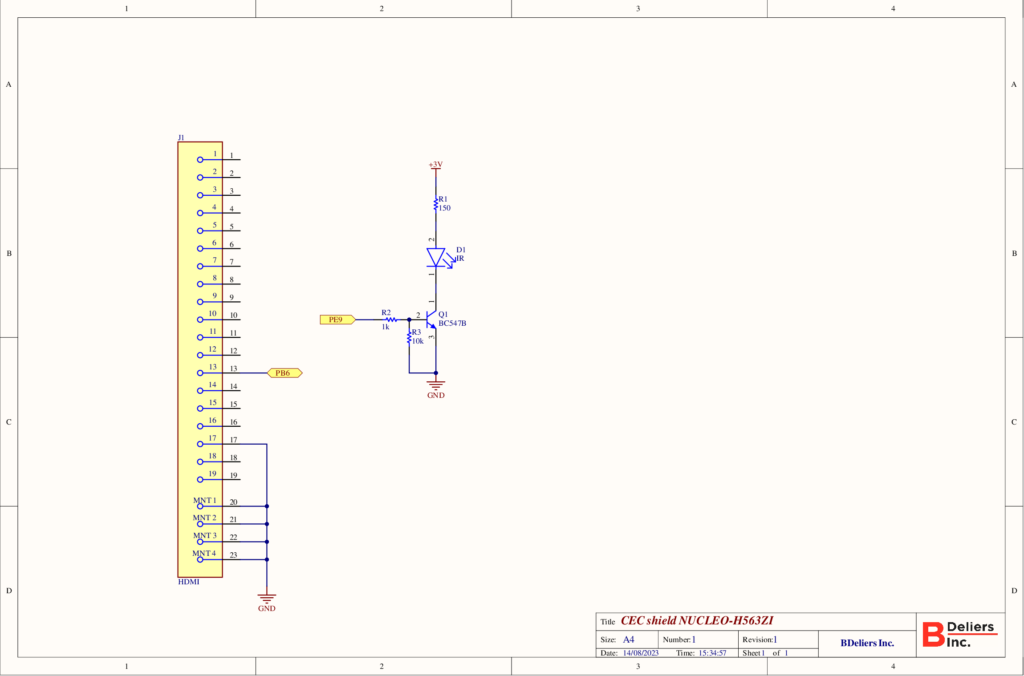
The hardware is quite simple. On a prototyping board plugged on top of the Nucleo, I routed the CEC pin from the HDMI connector to the microcontroller. The ground and shield of the HDMI are connected to the MCU’s ground. For the infrared output, a timer-enabled pin of the MCU is linked to the base of an NPN transistor, controlling the IR LED. The Nucleo board is powered over its ST-Link USB port and supplies a regulated +3V to the circuit. The following schematic summarizes the main connections.
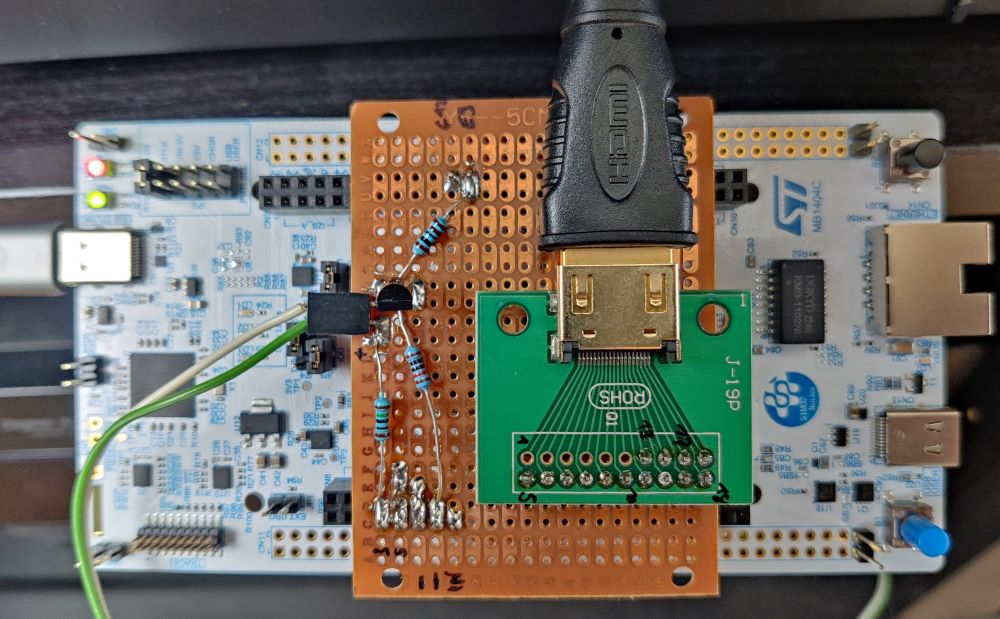
The result looks like this:
Retro-engineering
Before diving into code, I had to retro-engineer my audio amplifier’s remote command codes. It turns out that as it’s a Sony, the infrared uses SIRC modulation. In my case, it has 7 bits for command and 8 bits for address. I got the key codes for the functions I need (Volume +/-/mute, source selection) with an oscilloscope connected to an IR receiver.
The following website helped me a lot to understand the SIRC protocol SB-Projects – IR – Sony SIRC Protocol (sbprojects.net).
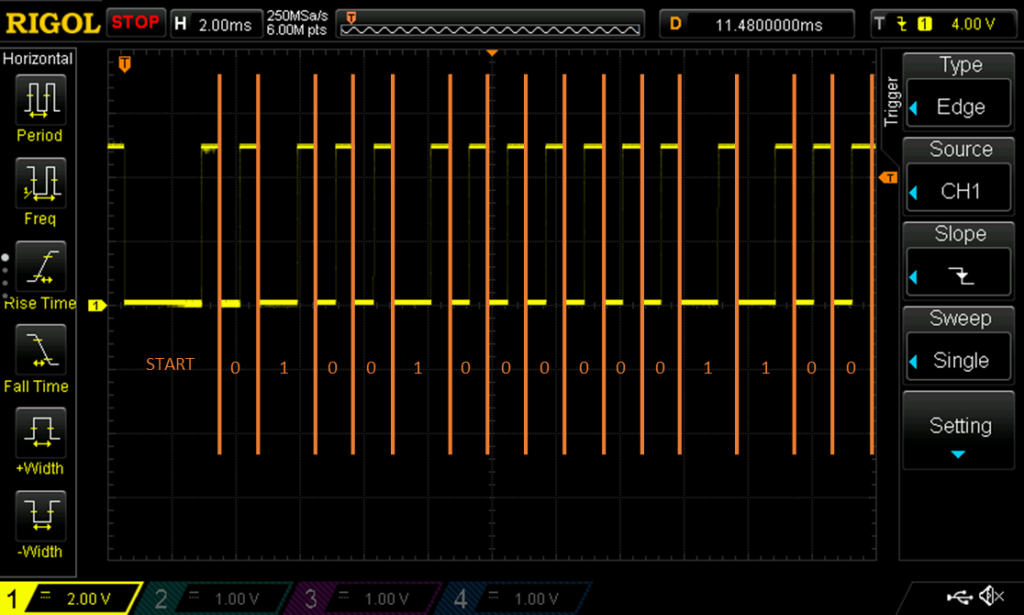
The previous scope shows the output of an infrared receiver when I press the “Volume +” key on my remote. The output signal is the opposite of the signal received (active low). When reading the bits, we get the bits 010010000001100, which gives 0b0010010 = 0x12 for the command and 0b00110000 = 0x30 for the address. Notice that in SIRC the LSB comes first so the bits are reversed compared to their incoming order.
On the other side, I had to dive into the HDMI standard to understand the CEC flow and the way to identify as the right device, the commands to be received and the ones to reply. The HDMI specification is not open-source, so I can’t link it to you there.
Software
All the magic in the project is in the software. First, a schematic of the modules involved!

The external libraries are in the blue blocks.
- STM32CubeH5 is the drivers set from ST to abstract the MCU’s hardware
- FreeRTOS which will handle threads, queues and scheduling
- log.c, a library to handle and format logs (a next post will say more about it)
The hardware and core components are initialized by the main file, which initializes all the peripherals and the RTOS. This file is the base of the project, it’s configured and generated with CubeMX. The hardware APIs are abstracted by the DrvXxx modules. The AppXxx modules handles the application business logic.
As the STM32H563 has a CEC unit, the CEC protocol is handled by hardware and the software just handles the reception and transmission of the messages. For the infrared part, a timer generating a PWM for the carrying frequency is started and stopped by a second timer at the right intervals to generate SIRC frames.
All the CEC and Infrared frames as well as the logs are queued and handled by the hardware asynchronously to stick to real-time. A full logging of the incoming and outgoing infrared and CEC frames can be enabled.
Here is the global flowchart of the software with its main threads:

Use flow

To conclude
This quite dense article describes a project that I can profit every day. It could be extended to control other devices than an audio amp. What could be improved? Right, the project is tailor-made for my specific use case, but with not that much effort it could be fully configurable to fit any need: change the type of device, the infrared protocol, the remote’s keys.
All the source code is available on my gitHub as usual.
![]()